

Roof rafter calculations: The complete Australian guide
Roof framing is where a lot of carpentry mistakes get buried, literally. By the time the roof is sheeted and the tiles are on, any undersized rafters, incorrect birdsmouth cuts, or misread span tables are locked in. The consequences show up later: sagging ridgelines, deflection in the ceiling, or worse, a structure that fails under wind loading.
This guide covers roof rafter
calculations, the way a site supervisor would explain them, with the formulas, the span table logic, the worked examples, and the compliance references you need to get it right on Australian residential projects. Whether you’re pricing a new home, working through an extension, or supervising a subcontractor’s framing, understanding rafter sizing is non-negotiable.
If you are new to framing calculations, it may help to first read our guide on stud calculation and wall framing types with stud and framing calculation, which covers the fundamentals of timber-framed construction before moving to the roof level.
What Governs Rafter Size? The Six Key Variables
Before you open a span table, you need to pin down six variables. Get any one of these wrong and your rafter sizing will be off, sometimes dangerously so.
- Roof pitch
Pitch determines the slope angle of the rafter relative to the horizontal. In Australia, roof pitch is expressed in degrees. Common residential pitches range from 15° to 35°, with most southeast Queensland homes sitting around 22.5° to 27°. Pitch affects rafter length directly and influences wind uplift and water drainage considerations.
- Rafter span
Rafter span is the horizontal distance the rafter covers between supports, typically from the wall plate to the ridge. This is not the same as rafter length, which runs along the slope. Single-span rafters bear at each end only; continuous-span rafters cross two or more spans, which changes structural behaviour significantly and allows for longer unsupported runs.
- Rafter spacing
Standard rafter spacing under AS 1684 is either 450mm or 600mm on centre. Tiled roofs typically run at 450mm centres due to the higher dead load of the tiles. Metal sheet roofing often allows 600mm centres. Spacing directly affects how much load each rafter carries; tighter spacing means smaller individual timber sections but more rafters and more labour.
- Roof load
Roof load breaks into two components. Dead load is the weight of the roofing material, battens, insulation, and the rafter itself. Concrete tiles add approximately 45–55 kg/m², terracotta tiles 40–50 kg/m², and metal sheet roofing around 10–15 kg/m². Live load under AS 1684 is 0.25 kPa for non-trafficable roofs and 1.1 kPa for roofs designed for maintenance access. Getting the load category wrong is one of the most common errors when selecting from span tables.
- Timber stress grade
This is the single most critical selection variable and the one most frequently misunderstood on-site. The main grades you will encounter in Australian residential framing are:
TIMBER GRADE TABLE
Grade | Description | Common Use |
MGP10 | Machine-graded pine, moderate strength | General residential framing |
MGP12 | Higher grade MGP pine | Where longer spans are required |
F7 | Visually graded hardwood | Roof and floor framing |
F8 | Visually graded hardwood | Structural roof framing |
F11 | High-grade hardwood | Long spans, heavy loads |
F14 | Premium hardwood | Heavy structural applications |
MGP10 treated pine is the workhorse of residential roof framing in southeast Queensland. MGP12 gives you roughly 10–15% more span capacity for the same section size, which matters when you’re trying to push a span past 3.5m without stepping up to a deeper timber.
- Wind Classification
Often overlooked until the certifier asks for it. Australia’s wind classifications under AS 4055 and AS/NZS 1170.2 run from N1 through N6, with C1 through C4 for cyclonic regions. The Gold Coast and southeast Queensland coast fall primarily in N2 to N3 for most residential areas, though exposed ridgetop or beachfront sites can push into N4. Your wind classification affects rafter connections, tie-down requirements, and maximum allowable spans.
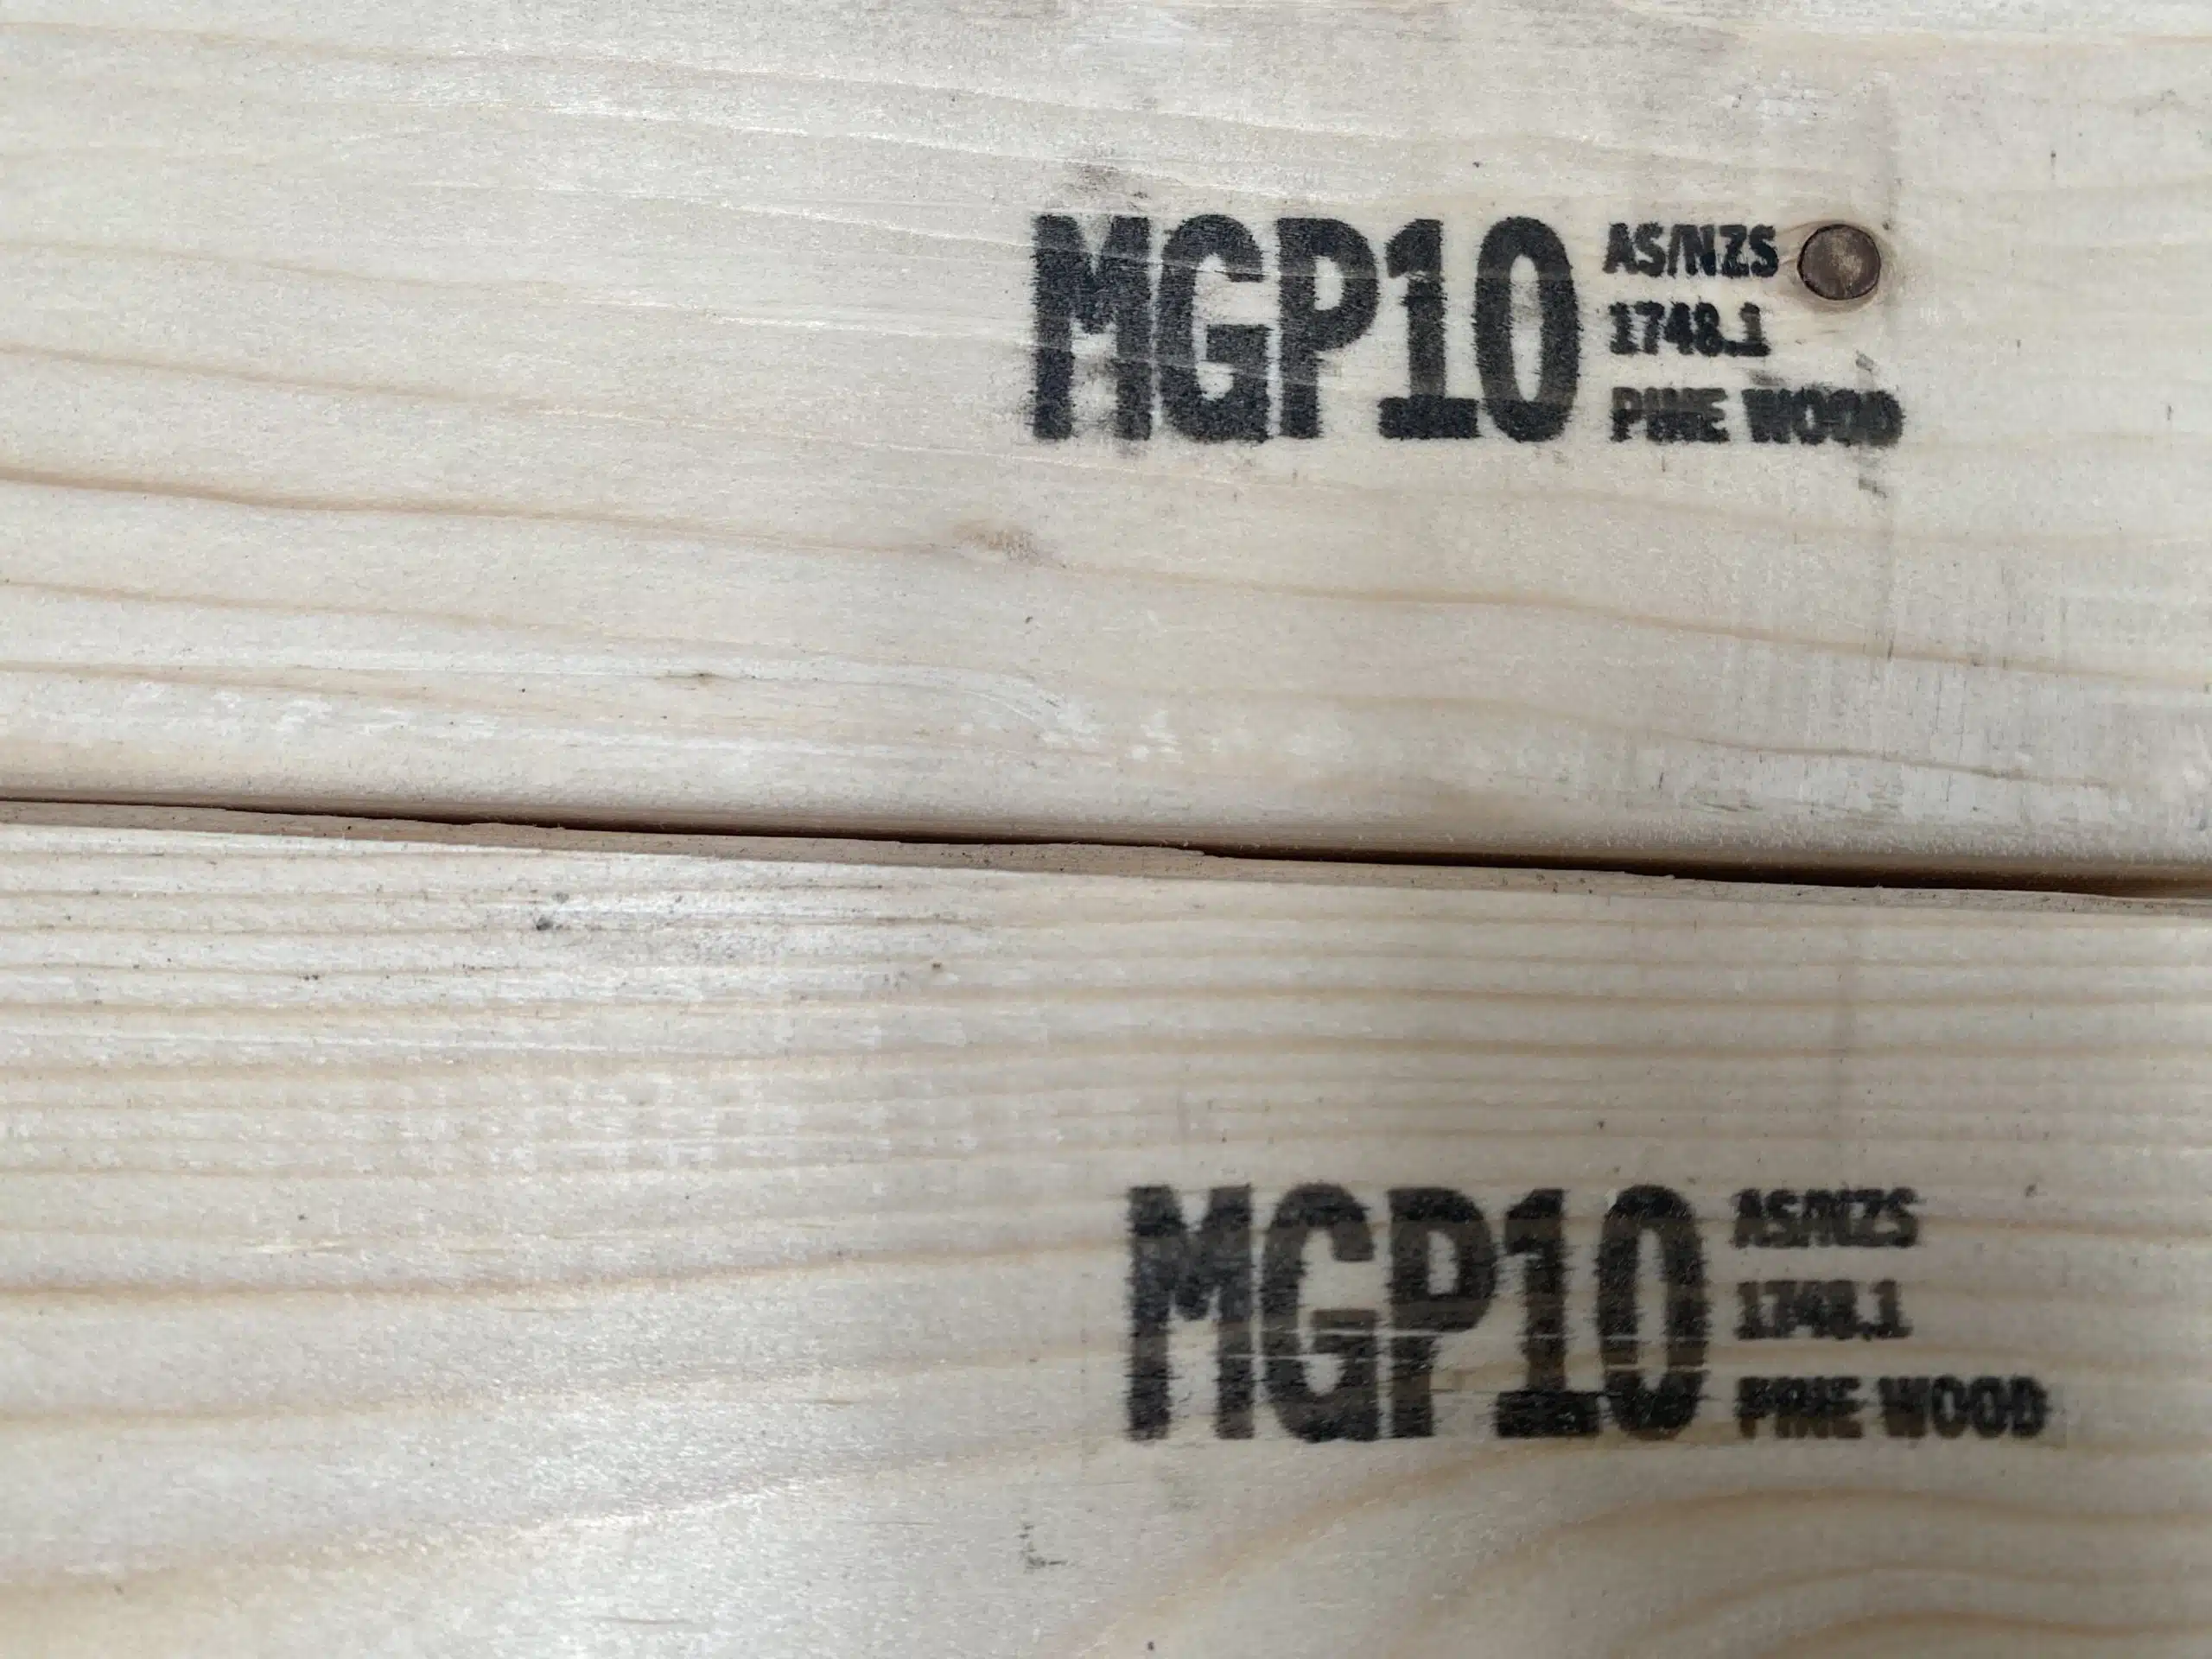
Machine-graded pine (MGP10) grade stamp, every piece of structural timber should be checked before it goes into the frame. An incorrect grade used in good faith still produces a non-compliant structure.
How to calculate rafter length
The rafter length formula is straightforward trigonometry. The rafter forms the hypotenuse of a right-angle triangle where the run is the horizontal base and the rise is the vertical height.
The core formula
Rafter Length = Run ÷ cos(Pitch Angle)
Where Run is the horizontal distance from the wall plate to the centre of the ridge (half the building width), and Pitch Angle is the roof slope in degrees.
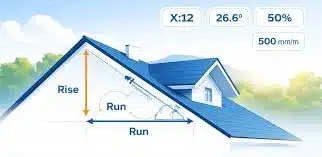
Worked Example — Gable Roof
– Building width: 10,000mm
– Roof pitch: 22.5°
– Eave overhang: 600mm
Step 1 — Calculate the run
Run = 10,000 ÷ 2 = 5,000mm
Step 2 — Calculate rafter length to ridge
Rafter length = 5,000 ÷ cos(22.5°)
cos(22.5°) = 0.9239
Rafter length = 5,000 ÷ 0.9239 = 5,412mm
Step 3 — Add the eave overhang
Overhang along slope = 600 ÷ cos(22.5°) = 600 ÷ 0.9239 = 649mm
Total rafter length = 5,412 + 649 = 6,061mm
Order your rafters at 6,100mm to account for the birdsmouth cut and any trimming at the ridge. If you’re using a digital calculator, the BuiltSimple rafter calculator is a solid Australian-based tool that works in millimetres and references AS 1684.
Rise Calculation
If you need the ridge height above the wall plate:
Rise = Run × tan(Pitch Angle)
Rise = 5,000 × tan(22.5°) = 5,000 × 0.4142 = 2,071 mm
This figure is useful for ordering ridge board material, setting out fascia heights, and coordinating with the ceiling height inside.
Reading AS 1684 Span Tables for Rafters
AS 1684 — Residential Timber-Framed Construction is the governing standard for all residential timber-framed buildings in Australia. Part 2 covers non-cyclonic areas, Part 3 covers cyclonic areas, and Part 4 is a simplified version for low-risk applications.
The span tables within AS 1684 do the structural engineering for you and help you correctly identify your inputs before you open the table. The most common mistake is jumping straight to the table without confirming all six variables covered in the previous section.
How to Use the Tables
First, identify your roof load type. The standard distinguishes between a sheet roof (light) and a tiled roof (heavy). This is the first filter, and it changes the allowable span considerably. Next, confirm your rafter spacing (450mm or 600mm OC), your timber stress grade, and your wind classification. With all four confirmed, you can find the maximum allowable span for a given section size, or work backwards to find what section size you need for a given span.
Indicative Span Table — Single-Span Rafters (Tiled Roof, 600mm Centres, Non-Cyclonic)
The values below are indicative, based on AS 1684.2 principles for N2 wind classification. Always verify against the current published tables for your specific grade, load, and wind classification before ordering timber.
Timber Section | Stress Grade | Approx. Max Span |
90 × 35mm | MGP10 | 1,500mm |
90 × 45mm | MGP10 | 1,700mm |
120 × 45mm | MGP10 | 2,300mm |
140 × 45mm | MGP10 | 2,700mm |
140 × 45mm | MGP12 | 2,950mm |
190 × 45mm | MGP10 | 3,400mm |
190 × 45mm | MGP12 | 3,750mm |
240 × 45mm | MGP10 | 4,200mm |
240 × 45mm | MGP12 | 4,600mm |
For the full, current span tables, WoodSolutions provides free access to the AS 1684 user guides. Timber suppliers, including Hyne Timber, also publish grade-specific span guides calibrated to their products.
Birdsmouth Cut: Getting It Right
The birdsmouth is the notched cut at the foot of each rafter that allows it to bear flat on the wall plate. It’s one of the most misunderstood cuts in roof framing, and an incorrect birdsmouth doesn’t just look wrong; it creates a structural weakness at the exact point where the rafter transfers load to the wall.
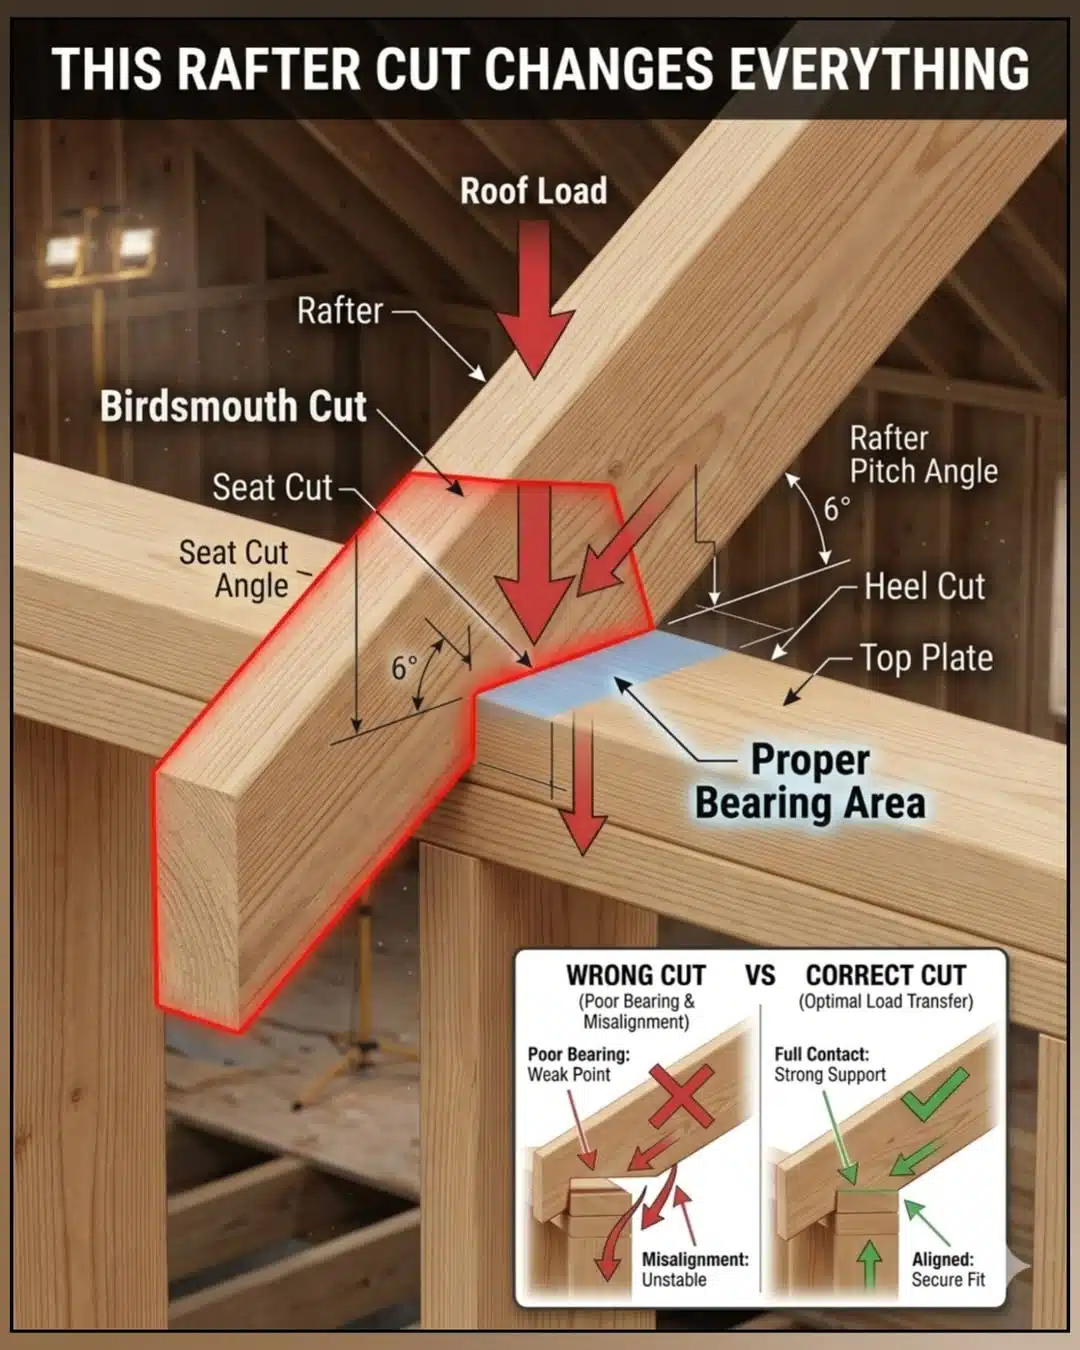
Components of a Birdsmouth
A birdsmouth consists of two cuts. The seat cut runs horizontally and sits flat on the top plate — it must be at least two-thirds of the top plate width but no more than the full plate width. The plumb cut runs vertically and bears against the inside face of the plate.
The Rule You Cannot Ignore
The plumb cut depth must not exceed one-third of the rafter depth. This is the rule most frequently violated on site, particularly when carpenters are chasing more bearing area on a narrow plate. Cutting deeper than one-third creates a stress concentration and can initiate a splitting failure along the grain, right at the point of maximum shear load.
Worked Example
Rafter size: 190 × 45mm MGP10
Top plate width: 90mm
Roof pitch: 22.5°
Maximum plumb cut depth = 190 ÷ 3 = 63mm
Minimum seat cut length = 90 × (2/3) = 60mm
At 22.5° pitch: seat cut runs 60–90mm along the horizontal, plumb cut stays at or below 63mm vertical. Mark the pitch angle with a sliding bevel, and confirm the plumb cut depth before committing the circular saw.
Ridge Board vs Ridge Beam: Knowing the Difference
This distinction matters structurally, and it catches out a lot of owner-builders and less experienced carpenters, particularly on renovation and extension projects where open ceilings are involved.
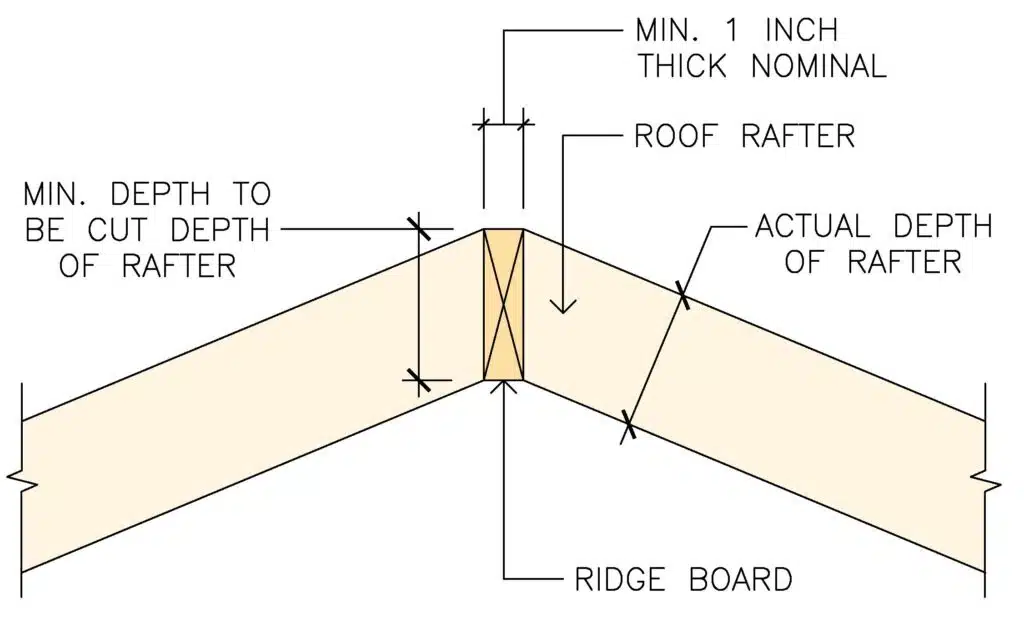
A ridge board is a non-structural element. It acts purely as a nailing point for opposing rafters. The two rafters lean against each other, and the horizontal outward thrust is resisted by the ceiling joists acting as structural ties across the building. The ceiling joists must be continuous from wall to wall and correctly nailed at each rafter intersection. A ridge board system only works when the roof pitch is 10° or greater, ceiling joists are properly tied, and the geometry sits within AS 1684 parameters.
A ridge beam is a structural member that carries vertical load from the rafters down to the end supports. It is required whenever ceiling joists cannot act as ties — raked ceilings, cathedral roofs, or any open-plan space where the ceiling line follows the roof slope. Ridge beams must be sized by a structural engineer and properly supported at each end by a post, wall, or beam. If someone tells you a ridge board is fine on a raked ceiling without ceiling joists, get a second opinion before any timber is cut.
Hip and Valley Rafter Calculations
Hip rafters run at 45° from the wall corner up to the ridge. Valley rafters sit at the internal intersection between two roof sections. Both carry more load than common rafters and require deliberate sizing; they can’t be sized by eye or assumed to be the same as a common rafter.
The Hip and Valley Factor
Because hip and valley rafters travel diagonally across the plan, they cover more horizontal distance than a common rafter for the same rise. The multiplier that accounts for this diagonal run is called the hip/valley factor.
For a standard 90° roof intersection, the most common in residential construction:
Hip/Valley Factor = √2 = 1.4142
For every 1,000mm of common rafter run, the hip rafter has a horizontal run of 1,414mm.
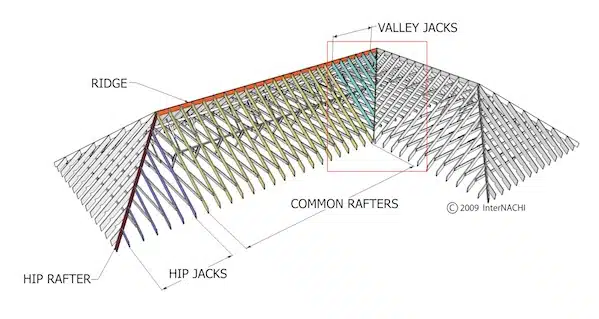
Hip Rafter: Worked Example
- Building width: 10,000mm (run = 5,000mm)
- Common rafter pitch: 22.5°
- Rise: 5,000 × tan(22.5°) = 2,071mm
-Hip rafter horizontal run = 5,000 × 1.4142 = 7,071mm
– Hip rafter pitch angle = arctan(2,071 ÷ 7,071) = arctan(0.2929) = 16.3°
– Hip rafter length = 7,071 ÷ cos(16.3°) = 7,071 ÷ 0.9598 = 7,367mm
Add the overhang component and order at 7,500mm minimum, with allowance for the crown cut at the ridge and the bird’s beak at the plate.
Valley Rafters
Valley rafters follow the same calculation method as hip rafters. The critical difference in practice is that valley rafters channel rainwater and accumulate debris. Connection detail, weatherproofing at the valley board, and long-term deflection are therefore more critical than for hip rafters. Undersized or deflecting valley rafters are a common source of ceiling staining and cornice cracking in older residential buildings, a problem that typically only presents itself years after the roof was framed.
Jack Rafters
Jack rafters are the shortened rafters that run from the wall plate up to a hip rafter (hip jacks) or from a valley rafter up to the ridge (valley jacks). They are parallel to common rafters in pitch but decrease in length as they step toward the hip or valley.
For a uniform 600mm OC spacing with a hip rafter at 45°, each successive jack rafter is shorter than the previous one by a constant amount along the slope:
Difference per jack = Spacing × Hip Factor = 600 × 1.4142 = 848mm
In practice, most carpenters set out the first jack rafter, mark the length, then subtract this constant for each subsequent one. A story pole or repeating square works well here. The critical thing to check is that the shortest jack rafter still achieves the minimum birdsmouth bearing. If it’s too short to carry a proper seat cut, the spacing needs to be adjusted or the hip rafter repositioned.
Ceiling Joists and Rafter Ties
In a conventional pitched roof with a flat ceiling, ceiling joists are not just lining supports; they do structural work. They act as ties that resist the horizontal outward thrust the rafters exert on the top of the walls. Remove them without engineering advice, and the walls will spread.
Under AS 1684, ceiling joists must be nailed to each rafter using the correct nail schedule, with a minimum of two 3.05mm × 75mm nails at each intersection. They must be continuous across the full building span or properly spliced over a support. In areas where ceiling joists can’t act as ties (raked ceilings, vaulted spaces), collar ties or a structural ridge beam are required. Note that collar ties are only effective when positioned in the upper third of the rafter span; locating them lower down is common but provides little structural benefit.
Common Mistakes in Roof Framing
A few errors come up repeatedly on residential sites across Australia, and most of them are avoidable.
Confusing rafter span with rafter length. Span tables reference horizontal span, not sloped length. If you measure along the slope and use that number in a span table, you will undersize your rafters. The difference on a 22.5° roof is about 8% enough to matter.
Not checking wind classification. Using N1 values in an N3 or N4 area produces a non-compliant structure. This comes up particularly on beachfront and hinterland sites where the classification is easy to underestimate. Always confirm with your certifier before finalising your rafter schedule.
Birdsmouth too deep. The plumb cut exceeding one-third of rafter depth is the single most common structural error in residential roof framing. It’s a quiet failure; the rafter looks fine until it doesn’t.
Wrong timber grade in the span table. MGP10 and F8 are not interchangeable. They have different modulus of elasticity and bending strength values, and using the wrong column in a span table is a silent error that nobody catches until the ceiling line shows deflection.
Ignoring concentrated loads. A maintenance worker on the roof applies a concentrated load that standard non-trafficable residential span tables don’t account for. On roofs where regular access is expected, confirm the load classification before sizing.
Rule-of-thumb sizing. “A 190 × 45 always works up here” is not a sizing methodology. It works in most cases; the case where it doesn’t is the one that matters.
Compliance: AS 1684 and the NCC
All residential roof framing in Australia must comply with AS 1684.2 for non-cyclonic areas or AS 1684.3 for cyclonic areas, covering sizing, connections, and construction methodology. NCC Volume Two, Part 3.4 sets out the acceptable construction practice for Class 1 and 10 buildings, including all roof framing requirements. AS 4055 governs wind loads for housing and determines your wind classification. AS/NZS 1170.2 applies for engineered designs beyond the scope of AS 4055.
In Queensland, structural framing must be carried out by a QBCC-licensed contractor. Owner-builders can undertake their own framing, but must still meet the same technical standards and are subject to inspection at frame stage. Non-compliance discovered at inspection means rectification before the next stage is approved.
For cyclonic areas (C1–C4), connection requirements are substantially more demanding. Cyclone straps, hurricane ties, and engineered hold-down systems are required at every rafter-to-plate, rafter-to-ridge, and roof-to-wall connection. Never apply non-cyclonic connection details north of the Tropic of Capricorn without first confirming the wind classification and reviewing the connection schedule.
Cost Implications: What Rafter Sizing Decisions Mean for Your Budget
Getting the rafter sizing right the first time has direct financial consequences that most people underestimate until they’re dealing with remedial work.
Stepping up from 140 × 45mm to 190 × 45mm MGP10 adds roughly $8–$14 per lineal metre at mid-2026 timber pricing. Across a 150m² roof with 60–70 rafters, that’s a $1,500–$2,000 cost difference is significant but straightforward to budget. Specifying MGP12 costs approximately 10–15% more per metre but can allow a smaller section size that achieves the same or greater span, and in some configurations, the MGP12 option is actually cheaper overall when you account for the reduction in section depth.
Roofs within AS 1684 parameters don’t require separate structural engineering. Once you move outside those parameters, such as long spans, unusual geometry, high wind classifications, LVL or engineered timber products, you will need a structural engineer’s report. Budget $800–$2,500 for a residential roof engineering report, depending on complexity and the number of members to be designed.
Remedial framing on an existing structure is where the real cost is. A deflecting ridge or a rafter that’s punching through the ceiling lining requires investigation, temporary propping, possible reroofing, and structural reinforcement. Depending on the scope, which ranges from $3,000 for localised repairs to $20,000 or more for a full re-frame.
For a building consulting or construction review before committing to a frame, Buildamax can provide a professional assessment that identifies these issues before timber is cut.
Practical Site Notes for Gold Coast and Southeast Queensland
A few local conditions that directly affect rafter design in this region.
Wind classification across most of the Gold Coast sits in N2 to N3 under AS 4055. Hinterland sites above 200m elevation and beachfront properties within 500m of the shoreline typically push one classification higher. Always confirm with your certifier, don’t assume the same classification applies across different sites within the same postcode.
For termite protection, timber in QLD roof framing is typically supplied as H2 Blue treated structural pine. H2 treatment is the minimum for framing in non-ground-contact applications in Queensland’s high-risk termite zones. Confirm treatment level with your supplier before accepting delivery, and check that the treatment is stamped on the timber itself, not just on the docket.
The Gold Coast sits in a non-cyclonic zone (south of the Tropic of Capricorn), so AS 1684.2 applies for most residential work. If you are pricing jobs in far north Queensland, Cairns, Townsville, or the Whitsundays, the connection schedules are a different document entirely, and the material costs are considerably higher.
Frequently Asked Questions
What is the standard rafter spacing in Australia?
Under AS 1684, the two standard rafter spacings are 450mm and 600mm on centre. Tiled roofs typically use 450mm centres due to the higher dead load. Sheet metal roofing often allows 600mm centres, which reduces rafter count and associated labour without compromising structural performance.
How do I know what size rafter I need?
You need five confirmed inputs before you open a span table: rafter span (horizontal, not sloped), rafter spacing, roof load category (tile or sheet), timber stress grade, and wind classification. With those five, you look up the correct section size in AS 1684.2.
Can I use MGP10 pine for a 4 metre rafter span?
Possibly, depending on spacing, roof load, and section size. A 240 × 45mm MGP10 at 450mm centres under a sheet roof can approach 5 metres. At 600mm centres under a tiled roof at that span, you’d typically need to step to MGP12 or increase the section depth. Check the published tables for your specific combination rather than interpolating.
What’s the difference between a ridge board and a ridge beam?
A ridge board is non-structural — a nailing point only. Ceiling joists resist the horizontal thrust. A ridge beam is structural, required when ceiling joists can’t act as ties (raked ceilings, open-plan spaces). Ridge beams require engineer sizing and proper end support. Using a ridge board in a situation that requires a ridge beam is a structural defect, not a shortcut.
How deep should my birdsmouth cut be?
The seat cut (horizontal) must be at least two-thirds of the top plate width. The plumb cut (vertical) must not exceed one-third of the rafter depth. On a 190mm rafter, the plumb cut hard limit is 63mm.
Do I need a structural engineer for a residential roof?
If the design sits within AS 1684 parameters — standard spans, standard loads, standard wind classification — no engineer is required. Once you’re outside those parameters (unusual spans, raked ceilings, high wind classifications, engineered timber products), structural engineering is necessary.
What wind classification is the Gold Coast?
Most of the Gold Coast is N2 to N3 under AS 4055. Beachfront and elevated sites can be N4. Confirm with your certifier, as this affects not just rafter sizing but all connection and tie-down requirements throughout the frame.
How do I calculate the length of a hip rafter?
Hip rafter length = (common rafter run × 1.4142) ÷ cos(hip pitch angle). The hip pitch is shallower than the common rafter pitch because the hip rafter covers more horizontal distance for the same vertical rise. See the full worked example earlier in this guide.
Practical Takeaways
Rafter sizing is governed by six variables: pitch, span, spacing, load, timber grade, and wind classification. Miss any one of them and your sizing will be wrong, sometimes on the safe side, often not.
Use the AS 1684 span tables, which are free to access through WoodSolutions and remove the guesswork from sizing decisions. Never cut a birdsmouth plumb cut deeper than one-third of the rafter depth. Distinguish between a ridge board and a ridge beam before a raked ceiling project commits to its geometry. Hip and valley rafters carry more load than common rafters and need to be sized accordingly using the 1.4142 hip/valley factor. Ceiling joists in a conventional pitched roof resist horizontal wall thrust; they can’t be removed without engineering advice. Always confirm wind classification with your certifier before finalising a framing design.
How Buildamax Can Help
Roof framing looks straightforward until you’re standing on a half-framed structure trying to work out why the hip isn’t sitting right, or whether your rafter sizing will pass the certifier’s inspection. Getting these decisions right before the timber is cut is what separates a clean, compliant build from expensive remedial work.
Buildamax provides construction consulting, carpentry supervision, and building advice for residential and commercial projects on the Gold Coast and across southeast Queensland. Whether you need a second opinion on a framing design, help interpreting span tables for an unusual configuration, or a qualified eye on site during the frame stage, we’re available to help.